To repair chewed corners on furniture, start by cleaning the affected area and removing any loose wood particles. Next, fill in the chewed parts using wood putty, and sand the area smooth once the putty has dried.
To finish, apply wood stain or paint to match the rest of the furniture for a seamless repair. Repairing chewed corners on furniture can be a simple and cost-effective way to restore the appearance and functionality of your beloved pieces.

Whether it’s a cherished family heirloom or a favorite piece of decor, fixing chewed corners can breathe new life into your furniture. With the right tools and techniques, you can easily tackle this DIY project and enjoy the satisfaction of seeing your furniture restored to its former glory. This guide will provide you with practical steps to address chewed corners, ensuring your furniture looks as good as new.
Table of Contents
How to Repair Chewed Corners on Furniture – Understanding The Damage
Identifying Types Of Damage
When dealing with chewed corners on furniture, it’s crucial to first understand the nature of the damage and its specific characteristics. This can help you identify the best approach to repair the affected areas.
Scratches Vs. Chips
Chewed corners can result in varying degrees of damage, ranging from surface scratches to deep chips and gouges. Understanding the distinction between these types of damage is essential for determining the appropriate repair techniques.
Wood Types
The type of wood affected by the damage will also play a significant role in the repair process. Different wood species may require unique approaches and materials for effective restoration.
Assessing The Severity
Before embarking on any repair work, it’s important to assess the severity of the damage. This involves examining the extent of the chew marks and evaluating their impact on the structural integrity of the furniture.
Depth Of Chew Marks
Determining the depth of the chew marks is crucial in developing a targeted repair strategy. Deeper gouges may require more intricate repair methods, while surface scratches might be addressed with simpler techniques.
Structural Integrity
Assessing the structural integrity of the furniture is essential to ensure that the repair not only addresses the visual damage but also restores the stability and strength of the affected corners.
Preparing The Surface
When repairing chewed corners on furniture, one of the crucial steps is preparing the surface. This involves ensuring that the damaged area is clean, dry, and free of any rough edges. By following the right preparation techniques, you can ensure that the repair will be effective and long-lasting.
Cleaning The Area
Before you can start repairing the chewed corners, it’s essential to clean the affected area. Use a soft-bristled brush or a vacuum cleaner to remove any loose debris and dust from the damaged spot. This step will help ensure that the surface is ready for the repair materials.
Removing Dirt And Grime
If the chewed area is soiled or stained, use a damp cloth and a mild detergent to gently remove any dirt and grime. Be careful not to saturate the surface, as excess moisture can affect the repair process.
Ensuring Dryness
Allow the cleaned area to air dry completely before proceeding with the repair. It’s important that the surface is entirely dry to ensure proper adhesion of the repair materials.
Sanding The Chewed Area
Once the surface is clean and dry, use a fine-grit sandpaper to gently sand the chewed area. This will help smooth out any rough edges and prepare the surface for the repair compound.
Smoothing Out Rough Edges
Inspect the chewed area for any remaining rough edges or splinters. Use the sandpaper to carefully smooth out these imperfections, ensuring a level and even surface for the repair.
Choosing The Right Grit
When sanding the chewed area, it’s important to select the appropriate grit of sandpaper. A finer grit (around 120-150) is suitable for smoothing out rough wood surfaces, while a coarser grit (around 80-100) may be needed for more significant damage.
Choosing The Right Filler
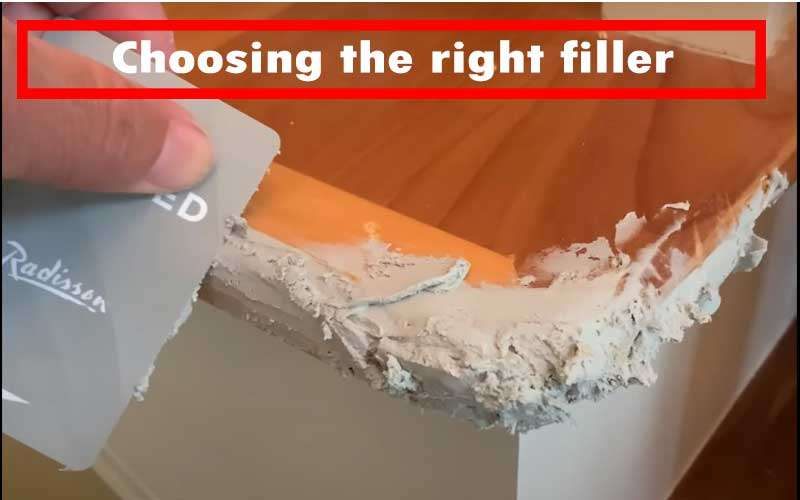
When it comes to repairing chewed corners on furniture, choosing the right filler can make all the difference in achieving a seamless finish. Understanding filler options and how to match the wood tone are critical steps in the repair process to ensure a professional-looking result.
Understanding Filler Options
Wood putty is a popular option for repairing minor damage such as chewed corners on wood furniture. It is a mixture of sawdust and a binding agent, available in various wood tones for a seamless finish. You simply apply the putty to the damaged area, allow it to dry, and then sand it smooth for a flawless repair.
For more substantial damage, epoxy resin can be an effective filler. It is a strong, durable material that can be molded and shaped to fill in larger areas. Although it requires mixing and careful application, epoxy resin provides a long-lasting fix for chewed corners.
When repairing chewed corners, it’s essential to match the wood tone of the filler to the original furniture. This involves identifying the type of wood and selecting a filler that closely resembles its natural color and grain. When choosing a filler, consider its compatibility with the surrounding wood for a seamless blend.
After applying the filler, staining the repaired area can help achieve a consistent look with the rest of the furniture. Choose a wood stain that closely matches the existing finish and apply it evenly to the repaired area for a uniform appearance.
To ensure a flawless repair, the final step is to blend the filled area with the surrounding surface. This may involve sanding the repaired area to smooth out any imperfections and create a seamless transition between the filler and the original wood. Careful blending and finishing can result in a nearly undetectable repair.
Applying The Filler
Repairing chewed corners on furniture involves several steps, with applying the filler being a crucial part of the process. By following the right techniques and using the appropriate tools, you can effectively restore the damaged areas to their original state. Let’s delve into the details of this essential step.
Filling The Chewed Area
The first step in applying the filler is to carefully fill the chewed area with an appropriate wood filler. Ensure that the filler you choose matches the color of your furniture to achieve a seamless finish.
Using The Right Tools
When working with the filler, it’s essential to use the right tools. A putty knife or a small spatula can be effective for carefully applying the filler to the damaged area. This will help ensure precise application and smooth blending with the surrounding wood.
Layering For Depth
If the chewed area is substantial, consider layering the filler to achieve the desired depth. Apply the filler in thin layers, allowing each layer to dry before adding more. This technique helps in building up the filler to match the original depth of the wood.
Allowing For Drying Time
After applying the filler, allow ample time for it to dry completely. This ensures that the filler sets properly and adheres to the wood surface, creating a sturdy and long-lasting repair.
Patience And Attention To Detail
Repairing chewed corners requires patience and attention to detail. Take the time to ensure that the filler is applied evenly and smoothly, blending seamlessly with the surrounding wood for a natural look.
Sanding For Smoothness
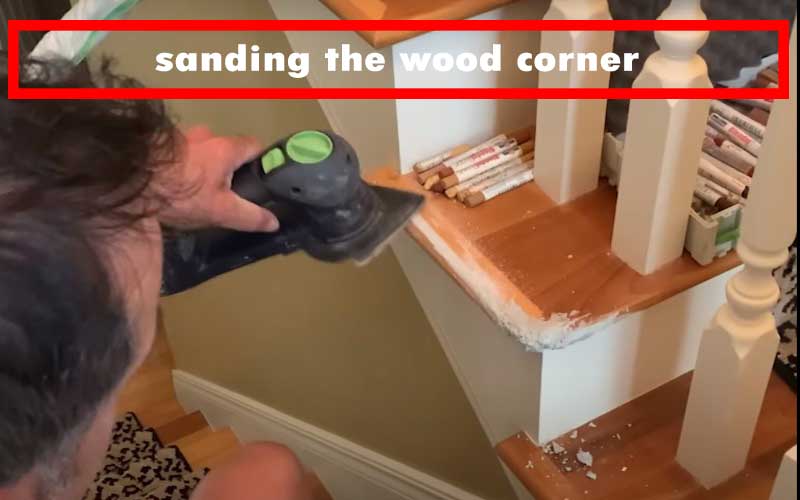
Once the filler is completely dry, use fine-grit sandpaper to gently sand the repaired area. This step helps in achieving a smooth and even surface, ensuring that the repaired corner seamlessly integrates with the rest of the furniture.
Blending And Finishing
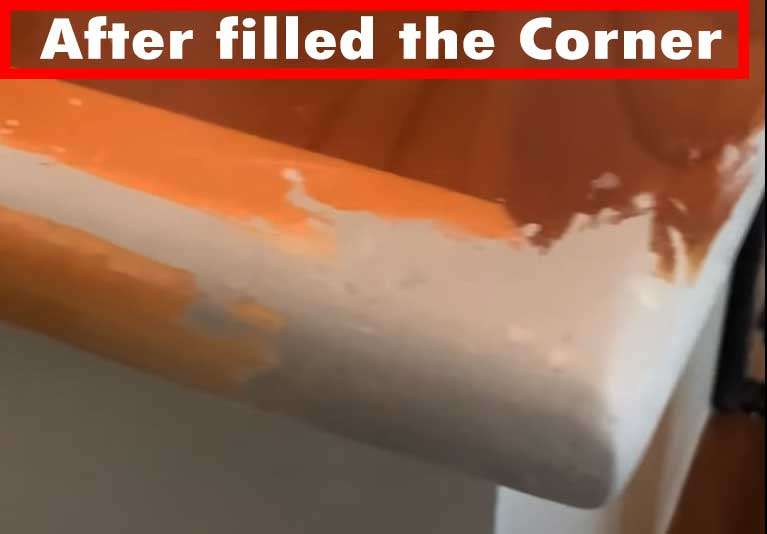
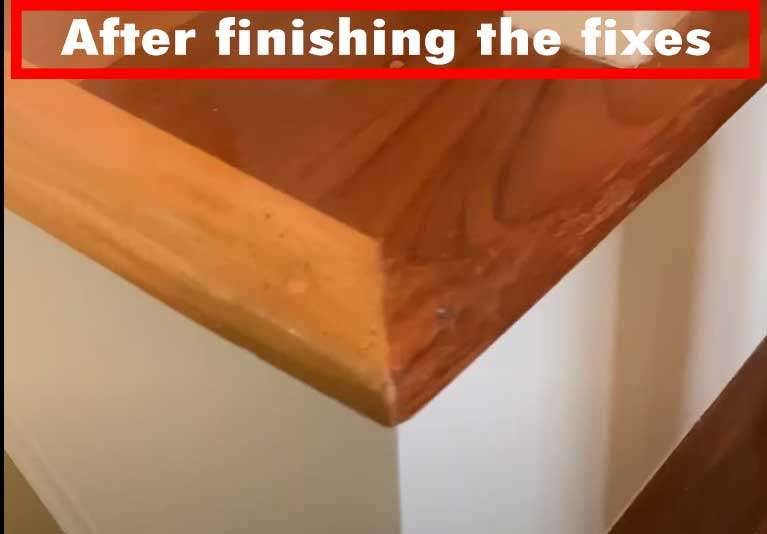
The blending and finishing of repaired chewed corners on furniture is crucial to achieving a seamless and professional appearance. By mastering the techniques of feathering the edges, seamless integration, avoiding sharp transitions, applying a protective finish, coating for durability, and buffing for shine, you can restore the damaged corners of your furniture to its former glory.
Feathering The Edges
When repairing chewed corners, feathering the edges is essential to create a smooth transition between the repair and the original surface. Using fine grit sandpaper, gently blend the repaired area into the surrounding wood, ensuring a seamless finish.
Seamless Integration
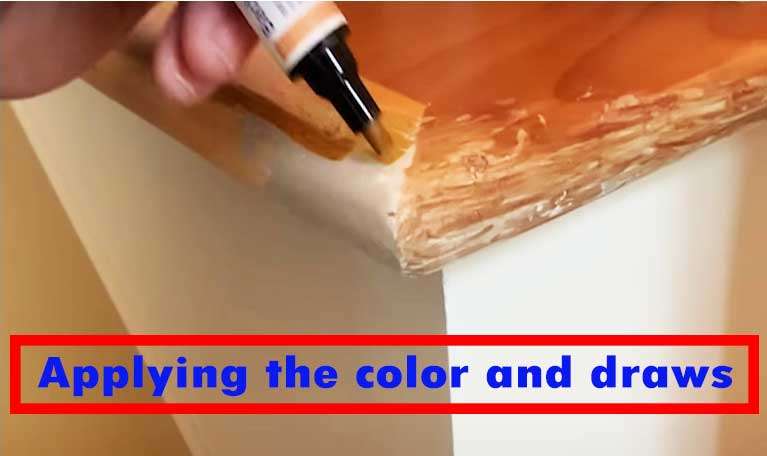
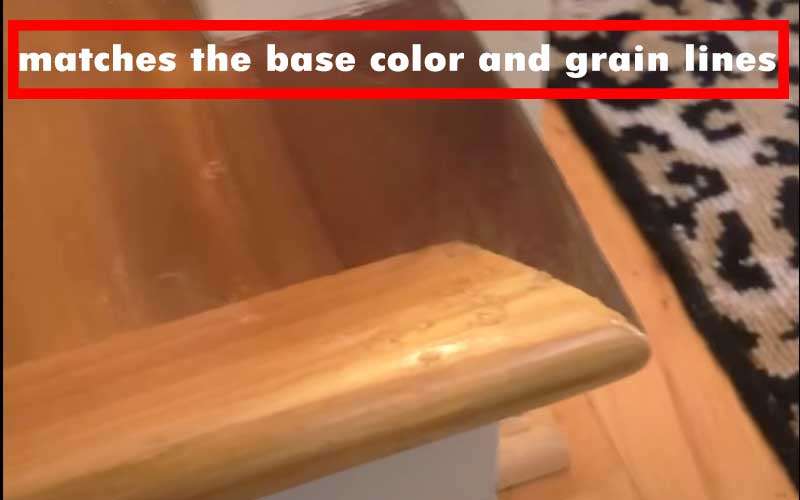
To achieve seamless integration, carefully blend the repaired area with the rest of the furniture. Use a combination of sanding and staining to match the color and texture of the surrounding wood, creating a harmonious and natural look.
Avoiding Sharp Transitions
Avoiding sharp transitions between the repaired area and the original surface is crucial for a professional finish. By feathering the edges and blending the colors, you can ensure a smooth and cohesive appearance, preventing any noticeable discrepancies.
Applying Protective Finish
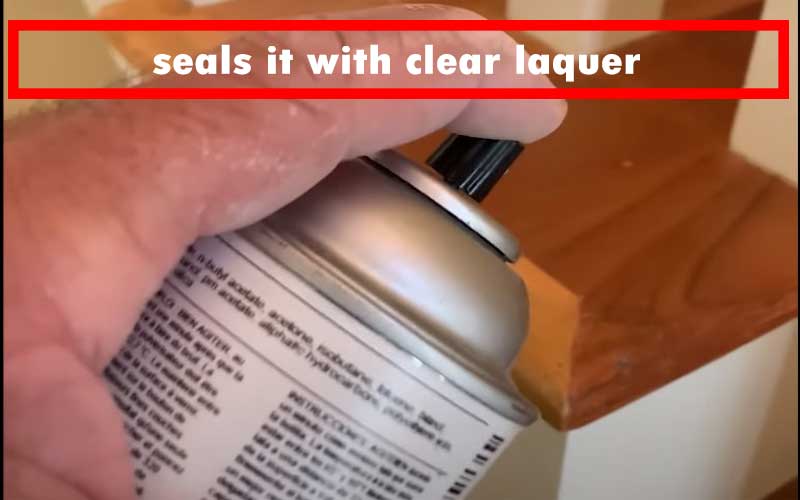
After blending and integrating the repair, apply a protective finish to safeguard the restored corner from future damage. Choose a high-quality varnish or sealant to enhance the durability of the repaired area, providing long-lasting protection against wear and tear.
Coating For Durability
Coating the repaired corner with a durable finish is essential for maintaining its longevity. Ensure that the protective coating is applied evenly, providing a strong barrier against everyday use and preserving the integrity of the repair.
Buffing For Shine
After the protective finish has dried, gently buff the repaired area to bring out its natural shine. Use a soft cloth or a fine abrasive pad to polish the surface, enhancing its luster and seamlessly blending it with the rest of the furniture.
Preventing Future Damage
Using Furniture Protectors
One effective way to prevent future damage to your furniture is by using furniture protectors. These come in various forms such as felt pads, rubber feet, and sliders. Felt pads are especially helpful for preventing scratches and scuffs on wood floors caused by furniture movement. By placing these protectors on the corners and legs of your furniture, you can mitigate the risk of repeated chewing damage.
Pads And Covers
Another strategy to consider is using pads and covers specifically designed to protect furniture from pet damage. There are specialized pads and covers available that are designed to withstand chewing and scratching. These protective elements not only safeguard your furniture but also deter pets from engaging in destructive behavior.
Deterrent Sprays
Deterrent sprays are formulated to discourage pets from chewing and scratching furniture. These sprays have bitter-tasting components that discourage animals from nibbling on furniture corners and edges. Applying a deterrent spray to vulnerable areas of your furniture can help to discourage pets from causing further damage.
Proper Pet Training
Training your pets is key to preventing future damage to your furniture. Through consistent and positive reinforcement training, you can teach your pets to avoid chewing on furniture. This involves redirecting their attention to appropriate chewing toys and rewarding them for engaging in proper behavior.
Redirecting Chewing Behavior
Redirecting your pet’s chewing behavior involves providing alternative outlets for their natural instincts. Interactive toys, chew bones, and scratching posts can redirect their attention away from the furniture. By providing appropriate items for chewing and scratching, you can help protect your furniture from future damage.
Creating Safe Zones
Creating safe zones within your home gives your pets a designated area where they can play and relax without the risk of causing damage. Designate specific areas or rooms where your pets can freely roam without access to valuable furniture. This approach helps to confine their activities to safe zones, minimizing the potential for destructive behavior.
Professional Repair Vs. Diy
When it comes to repairing chewed corners on furniture, the decision to choose between professional repair and DIY depends on various factors. Each approach has its pros and cons, and considering your budget, time, and the scope of damage can help you make an informed decision.
Considering Budget And Time
Both professional repair and DIY have associated costs and time investment. It’s essential to evaluate these aspects before deciding which route to take.
Cost Of Professional Services
Professional furniture repair services may involve higher costs due to the expertise and specialized tools and materials required. However, hiring professionals ensures a high-quality repair job.
Time Investment For Diy
DIY repairs may be more budget-friendly, but they often entail a significant time commitment. Depending on the complexity of the repair, DIY projects can take longer to complete.
Evaluating Scope Of Damage
Assessing the extent of the damage to your furniture is crucial. Some repairs may require professional attention, while others can be handled with simple touch-ups at home.
Complex Repairs
If your furniture has extensive damage, such as deep gouges or structural issues, professional repair may be the best option. Complex repairs often demand specialized skills and equipment.
Simple Touch-ups
For minor surface imperfections and small chew marks, DIY touch-ups can often suffice. These simple repairs can be tackled at home with readily available tools and materials.

Credit: m.youtube.com
Maintaining Repaired Furniture
To maintain repaired furniture, particularly addressing chewed corners, start by gently sanding the damaged area to smoothen any rough edges. Apply wood filler to the chewed corners and sand it again once it dries. Lastly, touch up the area with matching paint or wood stain for a seamless finish.
Regular Inspections
One of the key aspects of maintaining repaired furniture is to conduct regular inspections. By closely examining the furniture for any signs of damage or wear, you can identify issues early and prevent them from worsening.
Checking For Wear And Tear
Be vigilant in checking for wear and tear, particularly in areas that have been repaired. Look for any signs of deterioration, such as loose joints or cracks, and address them promptly.
Addressing Minor Issues Promptly
When minor issues are identified during inspections, it’s crucial to address them promptly. Ignoring small problems can lead to more significant damage, so take immediate action to resolve any issues.
Read more about: How to Smooth Acrylic Edges
Proper Cleaning And Care
Ensure that the repaired furniture is cleaned and cared for properly. Use appropriate cleaning products and techniques to maintain the quality of the repairs and prevent further damage.
Maintenance Tips
- Keep the furniture away from direct sunlight to prevent fading or weakening of repaired areas.
- Use furniture wax or polish to protect repaired areas and maintain the overall appearance.
- Avoid placing heavy objects on repaired sections to prevent stress and potential damage.
Longevity Of Repairs
With proper maintenance, repaired furniture can have an extended lifespan. By following the recommended care and maintenance practices, you can ensure that the repairs remain durable and functional for years to come.
Read Also: How to Polish Acrylic Countertops
Frequently Asked Questions On How To Repair Chewed Corners On Furniture
How Can I Repair Chewed Corners On Furniture?
To repair chewed corners on furniture, start by cleaning the area and filling the holes with wood filler. Sand the area, apply a primer, and then paint or stain to match the original finish. For a thorough repair, consider consulting a professional furniture restorer for best results.
What Tools And Materials Do I Need For Furniture Corner Repair?
The tools and materials you’ll need for repairing chewed corners on furniture include wood filler, sandpaper, a paintbrush, primer, and matching paint or stain. You may also need a putty knife, masking tape, and a small paint roller for smooth and seamless restoration.
Are There Any Preventive Measures To Avoid Furniture Damage?
To prevent furniture damage, consider using furniture protectors, training pets to avoid chewing furniture, and providing appropriate chew toys if relevant. Regular inspections and quick repairs can also help prevent further damage. Additionally, providing appropriate environment and supervision can help mitigate the chances of furniture damage.
Final Thoughts
Repairing chewed corners on furniture is an achievable task with the right techniques and materials. By following the steps outlined in this blog post, you can restore the look of your furniture and prolong its lifespan. With patience and attention to detail, you can give your furniture a new lease on life and enhance the overall appeal of your living space.
Leave a Reply